Best Vegan Chick'N-Pea Salad (No Cook)
 All Vegan Dinners160 recipes
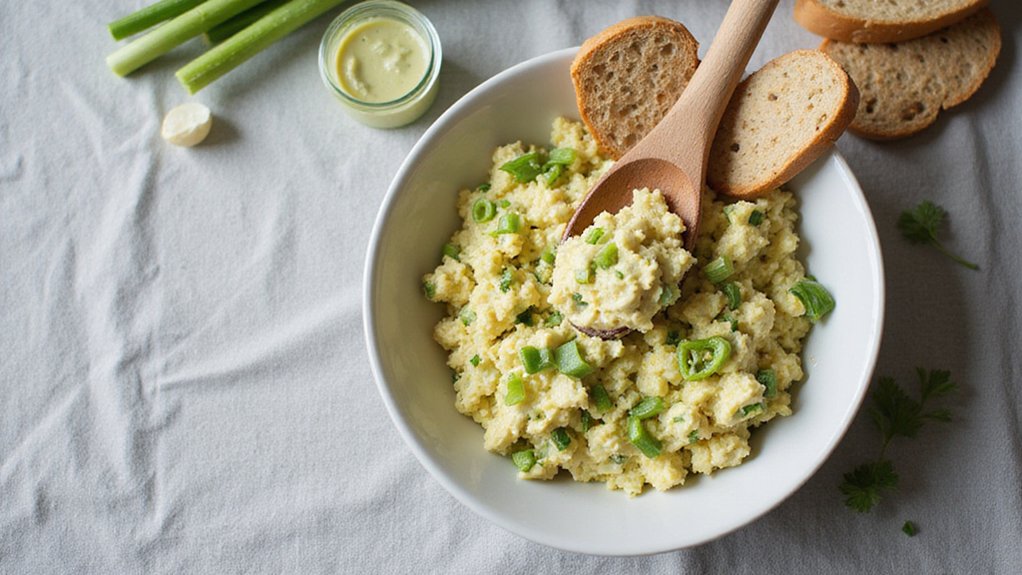
Chickpeas, crunchy vegetables, and a quick dressing come together in under 5 minutes with no heat required. Good for meal prep and holds well in the fridge for several days. Serve in a wrap or straight from the bowl.
No-Cook, Five-Minute Meal
This salad comes together quickly – most of the work is just mashing and mixing, with practically no cooking involved. From opening the can to serving, you’ll spend about five minutes total. Start by rinsing and draining your chickpeas, then mash them with a fork until they’re broken down but still textured. This texture matters because it gives your salad substance and keeps it from becoming a mushy paste. Next, stir in your vegan mayo and mustard, which bind everything together and add creaminess. Finally, chop your vegetables small and fold them in. Season to taste, and you’re done – no stove required.
Why Chickpeas Work Best
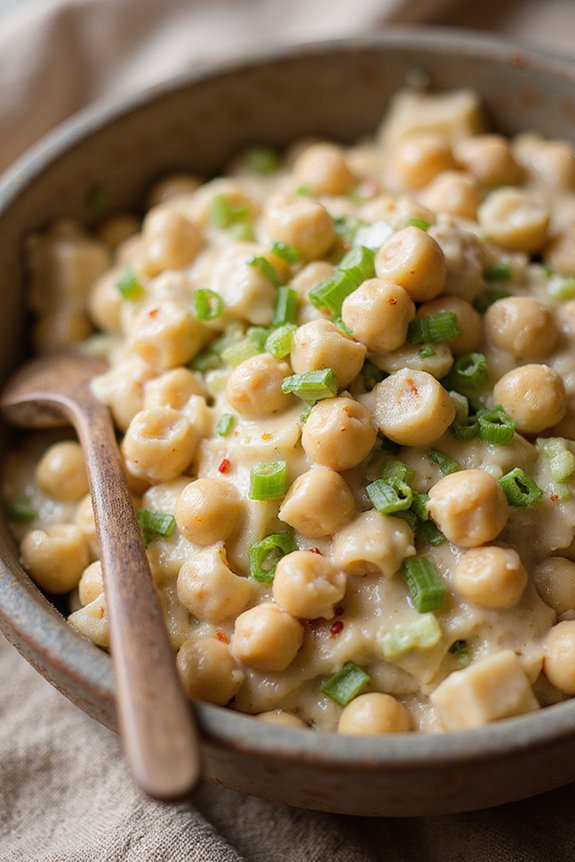
Chickpeas are the main ingredient of this vegan salad, giving you a protein-rich base that creates a satisfying texture when mashed. Their mild, nutty flavor works great with the creamy vegan mayo and zesty mustard, making them a perfect plant-based option. The beans hold up well when mixed with other ingredients and don’t break down into mush, so you get to keep that pleasant, chunky consistency throughout the dish.
I go for canned chickpeas because they’re convenient, though dried chickpeas that you’ve cooked work just as well. Make sure your vegan mayo is chilled before mixing – it helps bind the salad together better. Chop your vegetables the same size and keep them fresh; I like to prep them right before I put everything together so they stay crisp and bright. If you want something less spicy, just skip the red pepper flakes, and you can always taste and add more salt and pepper at the end to get it just right for you.
Mash Chickpeas for Texture
Begin by rinsing and draining your 14 ounces of canned chickpeas thoroughly under cool water. Empty the drained chickpeas into a medium-sized bowl. Using a fork, mash them until they reach your desired consistency – completely broken down but still retaining some texture. This texture is what gives the Vegan Chick ‘N-Pea Salad its satisfying, chunky consistency.
Once your chickpeas are mashed to the proper texture, add 1/2 cup of vegan mayo, 1 1/2 teaspoons of dijon mustard, and 1/4 teaspoon of crushed red pepper flakes if you prefer some heat. Stir these ingredients together evenly throughout the mashed chickpeas until well combined and the mixture takes on a creamy, cohesive appearance.
Next, prepare all your vegetables by chopping them small: 2 tablespoons of thinly sliced celery, 2 tablespoons of thinly sliced green onion (white part only), and 1 tablespoon of finely chopped green bell pepper. Add these measured vegetables to your mixture and stir everything together thoroughly. Taste the salad and adjust with salt and pepper as needed. For meal prep storage, transfer your salad to an appropriate cake pan for baking* or airtight container to maintain freshness. Serve the finished salad on a sandwich, with crackers, or spread on a baguette for a delicious plant-based meal.
Try Vegan Mayo Alternatives Instead
While vegan mayo works great in this recipe, other plant-based options can give you slightly different results depending on what you have on hand or prefer. You might try lighter vegan mayo brands, which have a lighter texture and don’t overpower the chickpeas. Alternatively, I’ve had success with homemade cashew cream blended with lemon juice and garlic – it adds richness while keeping things plant-based. Even aquafaba-based mayo works great if you’re adventurous. Each option changes the salad’s flavor slightly, so experiment to discover your favorite. The key is using enough to bind everything together without making it too creamy.
Serve With Crispy Tortilla Chips
One of my favorite ways to serve this salad is with crispy tortilla chips, which add a satisfying crunch that works well with the creamy chickpea mixture. The difference between the soft, mashed chickpeas and the hard, crunchy chips creates an interesting texture that keeps things interesting with every bite. You can use store-bought tortilla chips or make your own by frying or baking tortilla strips until they’re golden and crispy. For homemade tortillas, a cast iron tortilla press* makes flattening dough quick and effortless. I recommend choosing lightly salted varieties so you can control how salty your meal is. This combination works great as a casual lunch or appetizer.
Final Thoughts
This vegan chick ‘n-pea salad is a versatile dish that you can adapt based on what you’ve got on hand and what you’re craving. I love experimenting with different vegetables and seasonings to keep things interesting. You might swap celery for cucumber, add diced tomatoes, or try sriracha instead of red pepper flakes. The best part is that there’s no cooking involved, so you’re saving time and energy. Since it holds up well in the fridge for several days, you can make a batch ahead for quick lunches throughout your week.
Ingredients
Instructions
- 1 Drain and rinse chickpeas thoroughly. Transfer to a large bowl and mash with a fork until mostly broken down but still chunky — about half the beans should remain whole.
- 2 Add vegan mayo and Dijon mustard. Stir until evenly combined and creamy.
- 3 Fold in celery, green onion, and green bell pepper. Add red pepper flakes if using. Season with salt and pepper, taste, and adjust.
- 4 Serve immediately on bread, in a wrap, or over greens. For best texture, refrigerate for 15-20 minutes before serving. Keeps refrigerated up to 3 days.