Easy Vegan Pine Cones (Matsukasa) With Tofu
 All Vegan Dinners160 recipes
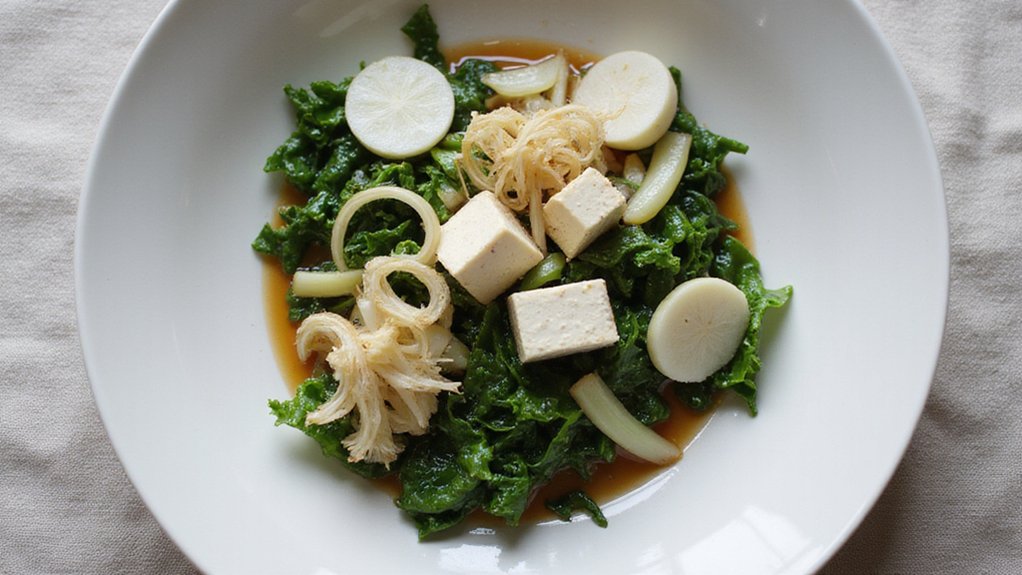
Tofu and shiitake mushrooms get scored and fried until the cuts open up and look like pine cone scales. Serve with ginger-soy dipping sauce alongside.
Crispy Outside, Tender Inside
How do you get tofu to transform from soft and delicate into something with a satisfying crunch? The answer’s in the pressing. When you boil and then press your tofu for 45 minutes under weight, you’re removing excess moisture that would otherwise make your pine cones soggy. Less water means the oil can actually fry the outside instead of steaming it. Once you’ve got that pressed tofu mashed with shiitake mushrooms, forming it into compact shapes helps too – denser formations crisp up better in the hot oil. Investing in a quality tofu press* makes achieving this ideal texture faster and more consistent than using improvised weights. The result? A golden, crunchy exterior protecting a tender, flavorful center.
Tofu Preparation Essentials
Creating delicious vegan pine cones requires picking ingredients that work together to build layers of flavor and texture. Start with quality tofu, which serves as the main protein base, while dried shiitake mushrooms provide an umami-rich depth. Complementary aromatics and seasonings, including fresh ginger and soy sauce, create a well-rounded flavor profile. A stainless steel tofu press* makes the pressing process efficient and ensures even moisture removal from your tofu.
Ingredients:
- 1 cake regular tofu
- 3 large dried shiitake mushrooms
- 1 teaspoon vegetable oil (for mushroom preparation)
- 2 teaspoons soy sauce (for mushroom mixture)
- ½ teaspoon sugar
- Vegetable oil (for deep-frying)
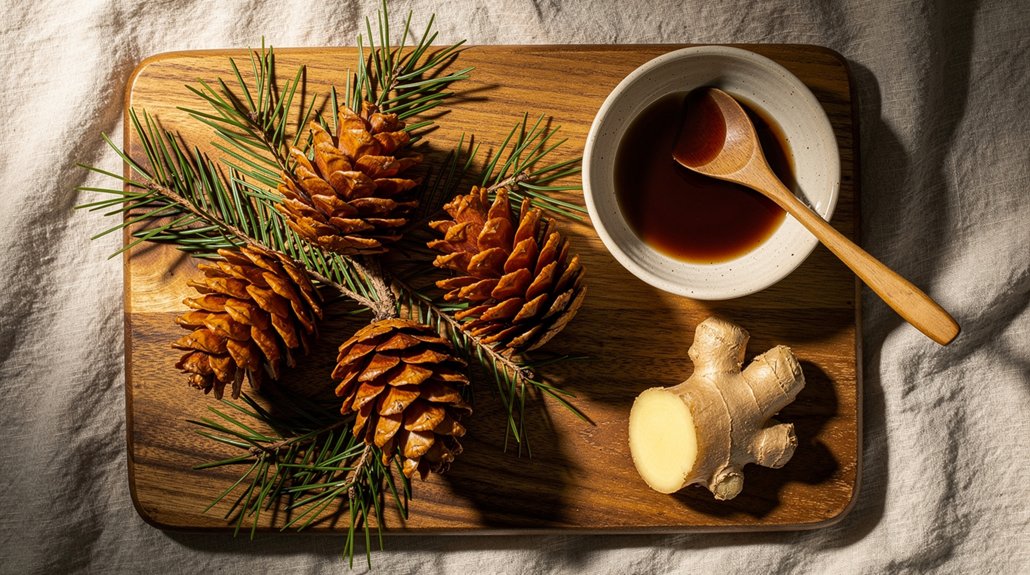
- 1 part fresh ginger juice
- 2 parts soy sauce (for dipping sauce)
Select firm or extra-firm tofu that will hold its shape after pressing and mashing. The dried shiitake mushrooms should be reconstituted properly so they are tender and flavorful – quality matters a lot since they will be the main flavor in the dish. Fresh ginger juice should be made from recently purchased ginger root for the best pungency and flavor. Also, make sure your vegetable oil has a high smoke point that works for deep-frying at 340°F, like peanut or canola oil.
Frying to Golden Perfection
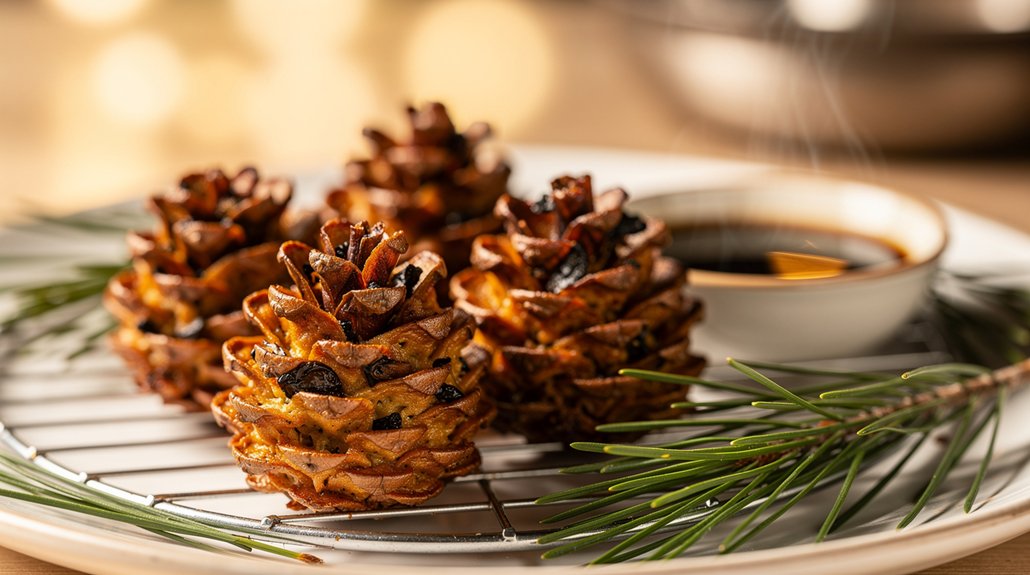
After forming your tofu-shiitake mixture into 12 small pine cone shapes, each approximately 1½ inches long and weighing about 1 ounce (30 g), you’re ready to fry. Heat vegetable oil to 340°F (170°C) over medium heat. The exact temperature really matters for getting that perfect golden-brown outside while keeping the inside tender. Use a thermometer to check the oil temperature while you’re frying, adjusting the heat as needed to keep it steady.
Carefully place each formed tofu pine cone into the hot oil and deep-fry until they turn a beautiful golden brown color. Work in batches if you need to avoid crowding the pan, which can drop the temperature and make them greasy instead of crispy. The pine cones fry fast, so keep a close eye on them to stop them from burning.
Once golden and crispy, remove the pine cones with a slotted spoon and drain them on a wire rack or paper towels to get rid of extra oil. Serve them hot alongside the ginger-soy sauce dipping sauce made from 1 part fresh ginger juice and 2 parts soy sauce. For a nice presentation, decorate your serving platter with pine needles to match the pine cone shape of these vegan treats.
Mushroom Alternatives and Seasonings
While shiitake mushrooms give these vegan pine cones their signature umami depth, you have plenty of other mushroom options that’ll work just as well. Cremini or portobello mushrooms bring earthiness without the cost. Oyster mushrooms add a delicate flavor that won’t overpower the tofu. For the seasonings, try swapping soy sauce with tamari if you need gluten-free, or add a pinch of white pepper for subtle heat. You can also drizzle sesame oil into your dipping sauce instead of ginger juice for richness and nuttiness that goes great with the crispy exterior.
Ginger-Soy Dipping Sauce
The ginger-soy dipping sauce ties everything together – it’s the flavorful companion that cuts through the richness of the fried tofu and brings out all those savory mushroom notes you’ve built into the pine cones. You’ll combine one part fresh ginger juice with two parts soy sauce, which creates a balanced condiment that’s both sharp and salty. The ginger’s heat works with the umami from the soy, while its brightness cleans your palate between bites. Mix these ingredients just before serving so the ginger juice stays vibrant, then drizzle generously or use it as a dipping sauce for maximum flavor.
Final Thoughts
Once you’ve got your tofu draining and your ginger-soy sauce mixed, you’re pretty much done – and what you’ve created is a dish that’ll impress anyone who tries it. These little bites show how tofu becomes something crispy and delicious when you treat it right. The savory depth from shiitake mushrooms and the sharp ginger-soy dip make each bite memorable. You’ve learned a technique that works for lots of other fillings too, so try out new ideas without worrying. Serve these at a dinner party or enjoy them by yourself – either way, you’ve made something worth being proud of.
Ingredients
Instructions
- 1 Soak shiitake mushrooms in hot water for 20 minutes until soft, then drain, squeeze dry, and finely chop; discard stems.
- 2 Wrap tofu in a clean towel, set a heavy pot on top, and press for 45 minutes to remove moisture; unwrap and crumble into a bowl.
- 3 Heat 1 teaspoon oil in a small skillet over medium heat, add mushrooms, soy sauce, and sugar, and stir-fry 2–3 minutes until fragrant; let cool, then mix into crumbled tofu with the cornstarch until the mixture holds when squeezed.
- 4 Divide mixture into 12 equal portions and shape each into a compact oval or pine cone shape, pressing firmly so they hold together.
- 5 Heat 5–8 cm of vegetable oil in a heavy pot or wok to 175°C (350°F); fry pine cones in batches of 4, turning once, for 3–4 minutes per side until deep golden and crisp; drain on a wire rack.
- 6 Whisk together soy sauce, ginger juice, and rice vinegar for the dipping sauce; serve pine cones immediately alongside.